JupyterLab Extension Tutorial
1. Basic Usage
As I was assigned to develop a code suggestion tool for JupyterLab by Korea Institute of Science and Technology (KISTI), this post summarizes the tutorial for building an extention.
Details can be found at https://www.youtube.com/watch?v=_ZexgrCGttU. (This link is connected to the tutorial of outdated version. There seems to be a lot of changes in 3.0 update)
What is JupyterLab?
JupyterLab is the next generation UI for Jupyter Notebook. It is developed to replace Jupyter Notebook with more modular and extensible architecture.
 -Original Notebook-
 -JupyterLab-
JupyterLab provides more interactive features such as npm based typescript support.
For the original Notebook, it is based on kernel that includes various compilers and interpreters supporting various programmin languages. However, reading this, I assume that you are already familiar with the Notebook environment. The notebook could have internal extensions but had a lot of compatibility issues.
Here, we deal with JupyterLab because it allows various custom extensions.
This is the repo for the jupyterlab
How to Install Extensions
Before installing, let’s check out two terms.
labextension - front end extensions. serverextension - back end extensions.
Let’s start with the labextension.
Start JupyterLab with the following command.
$ jupyter lab
If Jupyter packages are not installed, you can do it by the following command
$ pip install jupyterlab
Then you will see the red “Enable” button for searching and adding extensions.
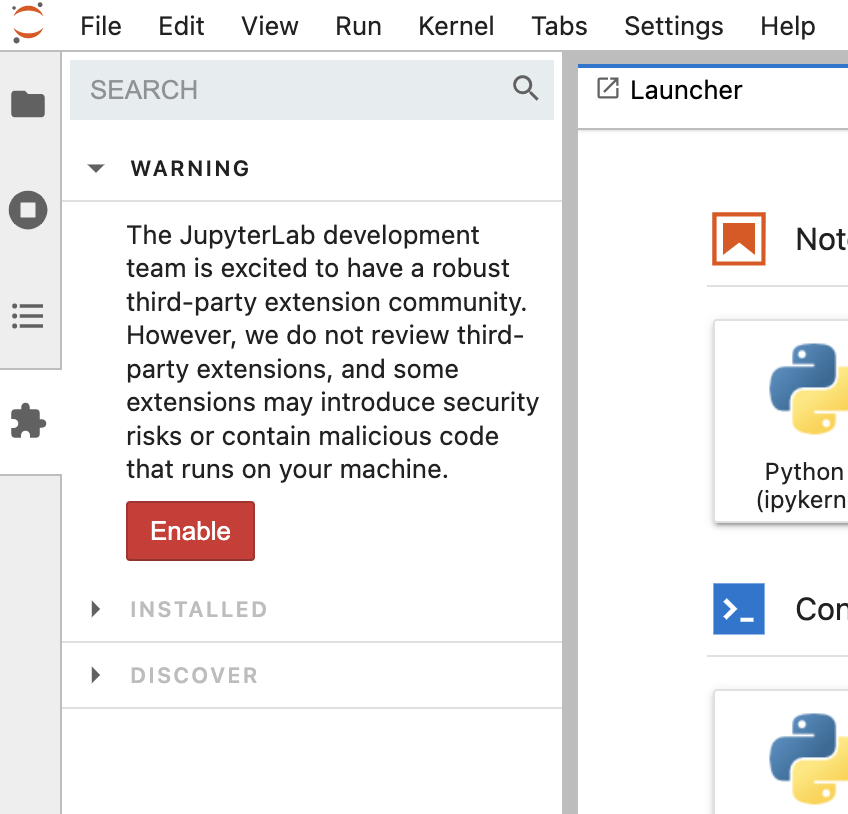
Here, you can install various extensions. Once you are done with the installation, it will ask you to reload the page. Once the page is reloaded, you can use the extenstions depending on the usage(mostly, there will be an added tab on the left side of the window).
If an implemented extension is published, it can be viewed in this search bar.
So, the labextension can be installed through the UI. On the other hand, the serverextensions are installed through CLI and also require restarting the JupyterLab.
How do we deal with both labextensions and serverextensions?
Let’s try with Git.
JupyterLab has the minimum number of inner extensions so that it can be customized with extensions.
Search for git, and you will see the following
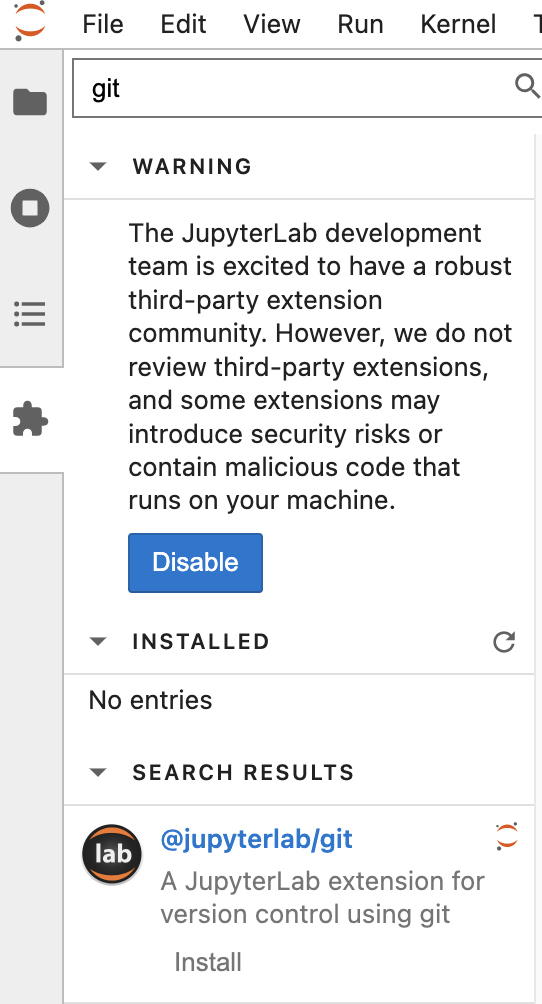
If you press install button, you will see the following alert window.
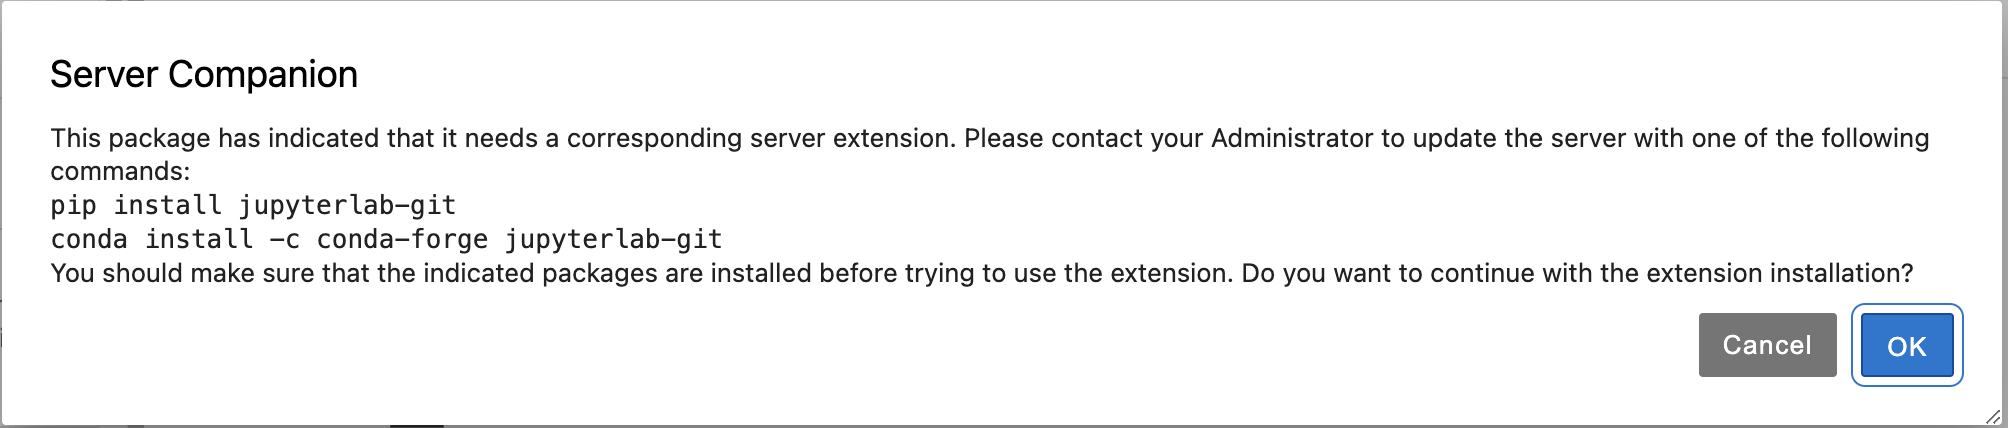
This means that the back end extension is not installed.
Follow the instructied commands
$ pip install jupyterlab-git
$ conda install -c conda-forge jupyterlab-git
If you haven’t already installed conda, please visit https://docs.conda.io/projects/conda/en/latest/user-guide/install/index.html to find out detailed instructions.
Also, don’t forget to switch your virtual environment if necessary.
On a successful installation, you will see the following output on console.

To pick it up the changes made, turn off the running lab and use the following command additionally.
$ jupyter lab build
** Make sure you close the JupyterLab tab from terminal to prevent any racce conditions **
Then, run it back on by
$ jupyter lab

Tada. You have Git interface installed on your JupyterLab.
In next post, we will start making an actual extension of our own.